Automatically Optimizing macOS Screenshots
I take a lot of screenshots at work, and I’m always annoyed that I have to manually run optipng over them to fully enshrink them for the web. Recently, I took a moment to automate this problem away using macOS’s Folder Actions feature. Folder Actions allow you to attach an AppleScript or Automator workflow to a folder, to be run when items are added to (or modified in or deleted from) the folder.
If you desire the same automation magic, start by putting the following AppleScript file into ~/Library/Workflows/Applications/Folder Actions/:
on adding folder items to thisFolder after receiving theseItems
	repeat with thisItem in theseItems
		set fileName to name of (info for thisItem)
		if fileName starts with "Screenshot" and fileName ends with ".png" then
			set filePath to POSIX path of thisItem
			do shell script "/opt/homebrew/bin/optipng " & quoted form of filePath
		end if
	end repeat
end adding folder items to
This AppleScript receives the path of any files added to the folder and runs them through optipng if the filename matches Screenshot*.png.
Name the file whatever you like. I chose optimize-screenshots. Update /opt/homebrew/bin/optipng to the location of optipng on your system. This is where homebrew puts it. If you don’t have optipng, install it with homebrew using brew install optipng, or check out the optipng website for more options.
Open your home folder in the Finder, then right-click (or control click) the Desktop folder. Click Folder Actions Setup… in the context menu.
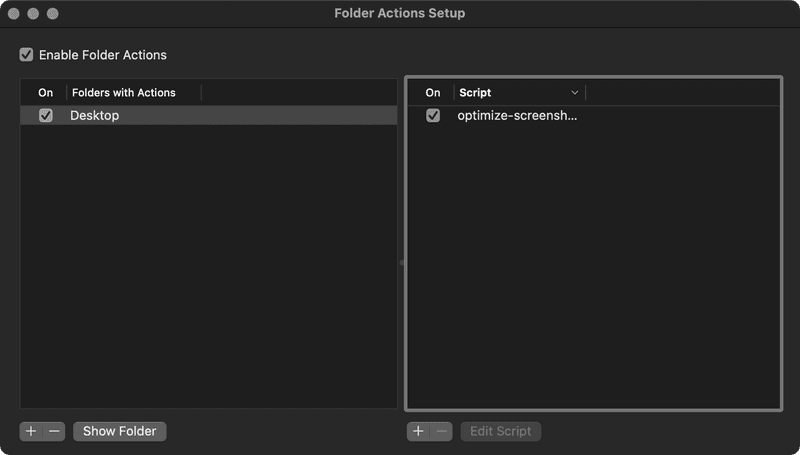
You are prompted to Choose a Script to Attach. Find your script, probably near the bottom of the list, select it, then click the Attach button. You should see a window similar to the following Folder Actions Setup interface:

This shows that optimize-screenshot is attached to the Desktop folder. Ensure that the Enable Folder Actions checkbox is checked and you’re done. The next screenshot you take will automatically be processed through optipngafter a second or three. You’ll see a gear icon in the menu bar indicating a script is being run.
If you use the Desktop folder often and don’t want an AppleScript running every time you do so, you might choose to have macOS save screenshots to a different location. Press command + shift + 5 to bring up macOS’s interactive screenshot interface, then click the Options button and set an alternate location in the Save to section of the menu. Attach the optimize-screenshots script to your alternate location using the same method.