Fail Cheese
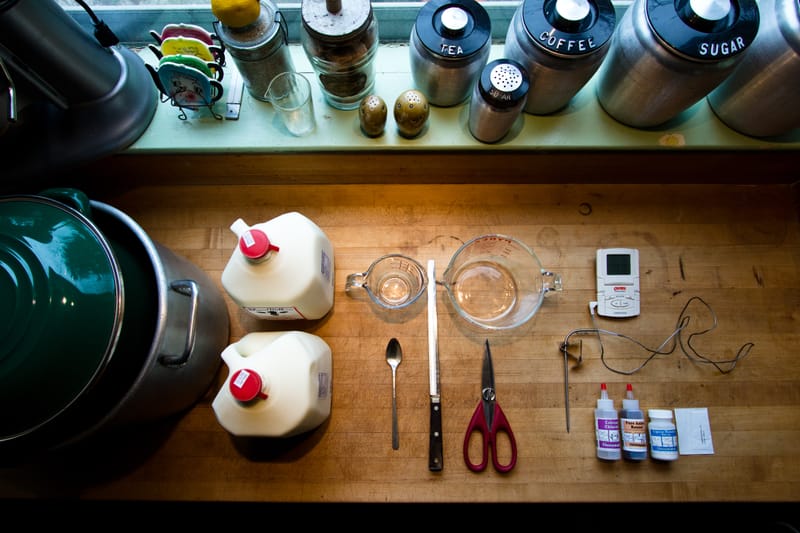
Making cheese seemed like a pretty simple process when I laid out all the tools above. A pot, some spoons, milk, cultures, a thermometer, a knife to cut the curd. Of course, throughout the day I kept having to root around the kitchen for all the things I forgot to include: measuring spoons, a big stirring spoon (lots of spoons involved here, I’m noticing), a pH meter, all sorts of bowls, ice, twine, gloves, a whisk. Yeargh!
Last Sunday really turned into an annoying day in the kitchen. I started at around noon, and didn’t have cheeses in the brine pot until nine or ten that evening (much of this time is just spent waiting around for microbes or enzymes to do their thing, admittedly). On top of that, I messed it all up during the very last step, so I cleaned up and went to bed with a mild case of the grumps.
Oh well. I’ll now step you through the process of making provolone, with too many pictures and too little explanation. It will look complicated (sortof) and time consuming (yup!), but if you’re interested in making cheese, there are many easier recipes you can start with (parmesean was really easy, if you don’t mind waiting six months to eat it), so don’t let the following mess dissuade you.

First step, sanitation! Every homebrewer’s favorite task, and just as important in cheesemaking. I gather all my utensils, and anything else that will touch the milk, and boil them for a bit. While that’s happening, I try to clean and scrub the entire kitchen as much as is practical, and then I kick everybody and everydog out of the room for the day. That always goes over well.
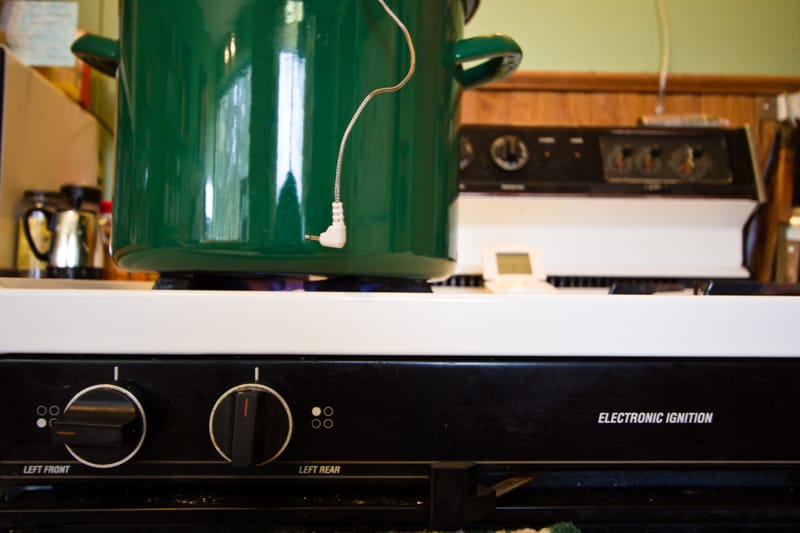
After the boil, I arrange my “clean zone” next to the stove, and fill the emptied pot with milk. I’ve been trying to get milk from the public market here in Rochester. Some folks from Ithaca show up every week with yummy cream-top milk, so I get two gallons for whatever silly cheese I’m making that weekend.
I don’t have pictures of adding the cultures and the rennet. There’s not much to look at, as the milk just stubbornly continues to look like a pot of boring ol’ milk. But, after bringing the milk up to ninety-seven degrees or so, you sprinkle in a powdered bacterial culture. This one was a buttermilk-ish type of culture. Others are more like yogurt. Their basic function at this point is to produce lactic acid… pH is really important throughout the cheesemaking process. This is intimidating to hobbyist cheesemakers, so most of the intro books completely ignore pH except when absolutely necessary, instead relying mostly on timing and crossed fingers to get things right. It seems to work out, usually, so no worries there (for now).
After the bacteria drops the pH a bit, we add in the rennet. This is the enzyme that actually curdles the milk. Stir it in, and then go relax for a bit. Forty minutes maybe?
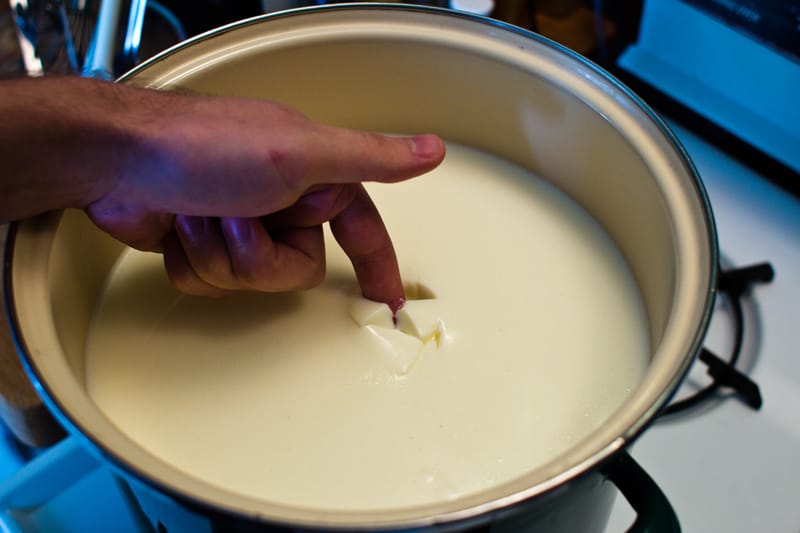
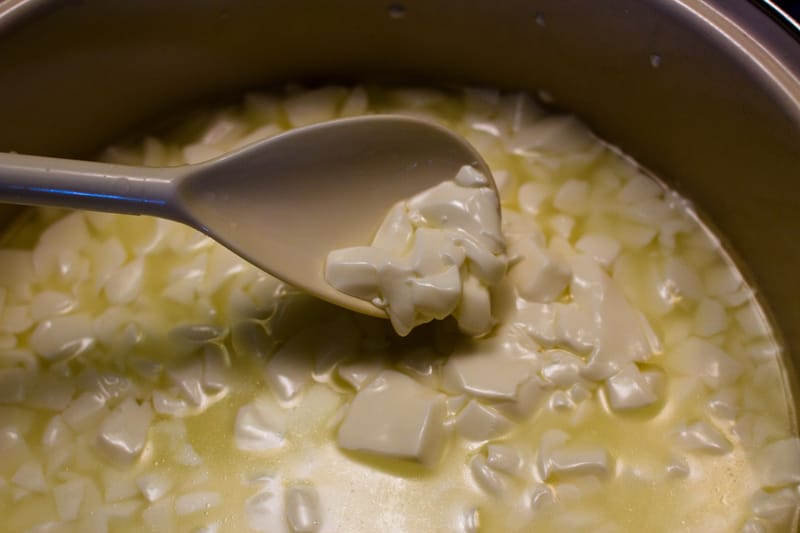
Wash your hands and give the curd a bit of a pokey-scoop with your index finger. If it looks like the picture above, you’ve got a “clean break” and you’re ready to cut your curd. I use a knife that I believe is designed for cutting roasts. It works well enough. Of course there are specialized curd knives… but you could probably even just use a long thin metal frosting spreader.
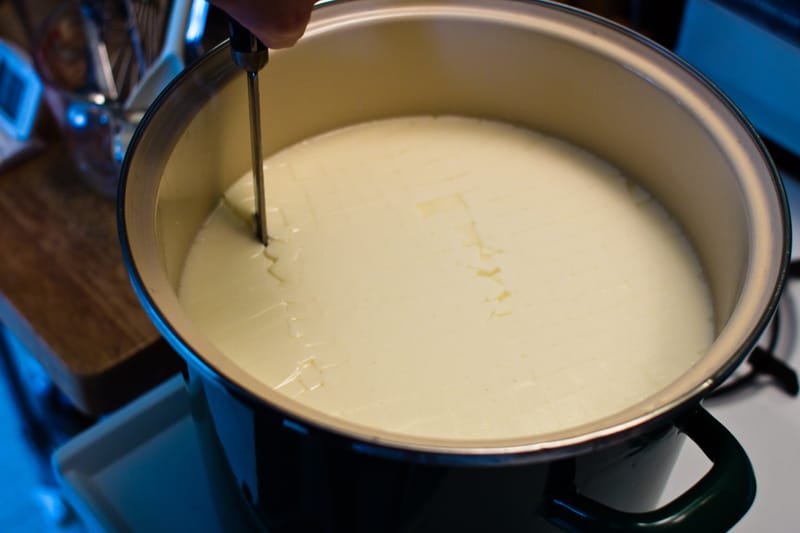
The goal here was to cut three-eighth inch cubes of curd. Getting your curd sizes even is pretty important (it’s mainly a moisture thing), and I fail at it every time. Things still work out well, but it’s something I definitely have to improve.
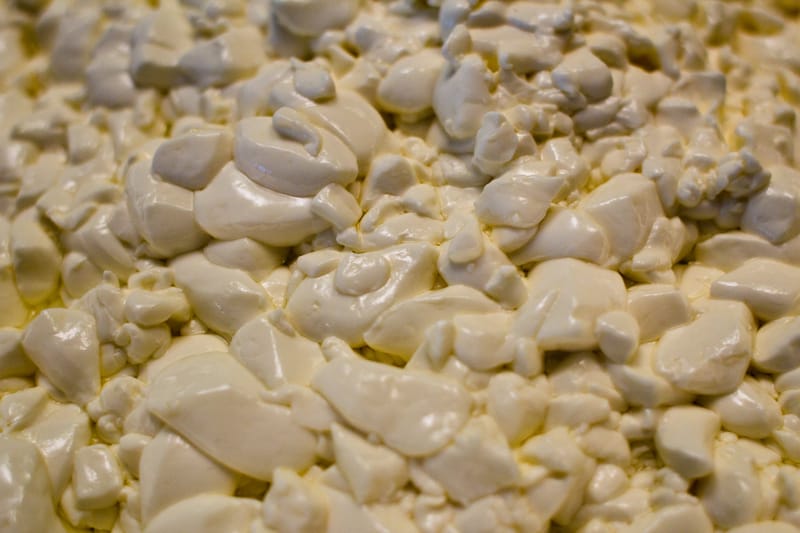
After cutting, the curds rest a bit. They are delicate little things at this point, and giving them a break lets them start to firm up before we jiggle them around with our stirring. Failing to do so could result in us bashing precious milkfat out of the curd structure and into the whey. Your whey should be a clear yellowish-green color, and if it’s clouded up, that means you’re guilty of curd abuse. Sinner.
Now we can stir! We raise the temperature up vewwwy vewwwy slowly (half a degree per minute in this case) while stirring with some regularity. Our goal is to expel more and more moisture from inside the curds. Going too fast can result in a “rind” of sorts forming on the curds, which would trap moisture in the interior. No good.
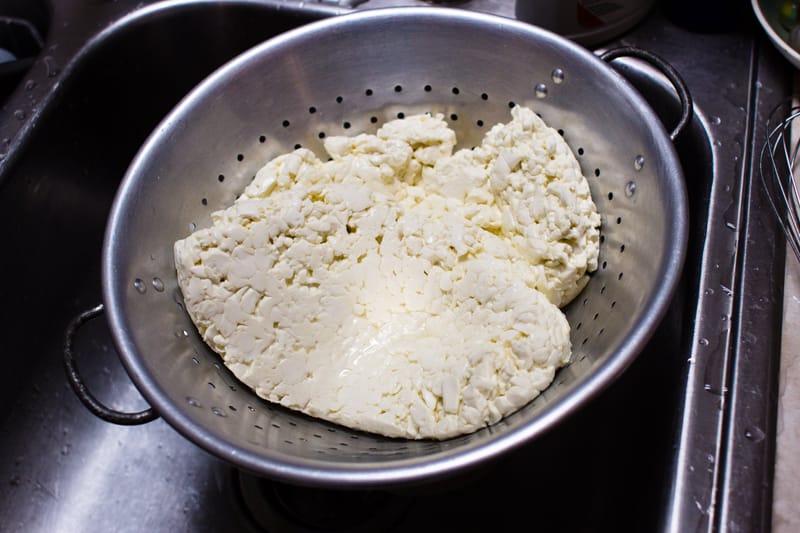
Having heated, stirred, rested, et cetera, we now drain the curd, seperating it from the whey (which we reserve for use as a brine later, though normally I would feed it to my imaginary pigs). It is then put back in the pot and held at 104 degrees or so for hours. The main goal at this stage is acidification, although we’re also expelling more and more water from the curd. In the case of provolone, mozzerella, and other stretched curd cheeses, pH is extra critical, as it is a big factor regarding whether the curd will stretch or not (it also heavily affects meltability).
I failed to document myself fumbling around with the pH meter. It probably took four hours for the curd to drop down to pH 5.2 and thus be ready for the next step.
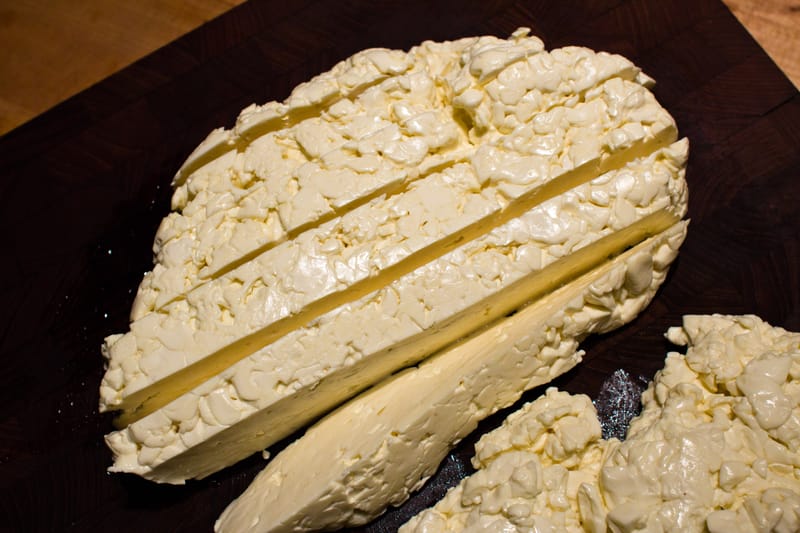
Drain your curd. Again. Then cut it up into cubes. We’re now ready to heat these cubes up and mush and stretch and pull them. Unfortunely, in this case, we’re also at the step where I totally failed. Well, not totally. Mostly.

The curd cubes go in a bowl, and hot whey or water is poured over them. We need to get the curd up to 170 or 180 degrees. This was my problem, I think. My whey was hot enough, but I don’t think the curd ever got up to the right temperature. I had bits that were stretching well, interspersed with unstretchy bits. At the time I thought my pH was off and I just soldiered on. In hindsight, I should’ve put the whole gloppy mess back on the stove until the curd came up to temperature.
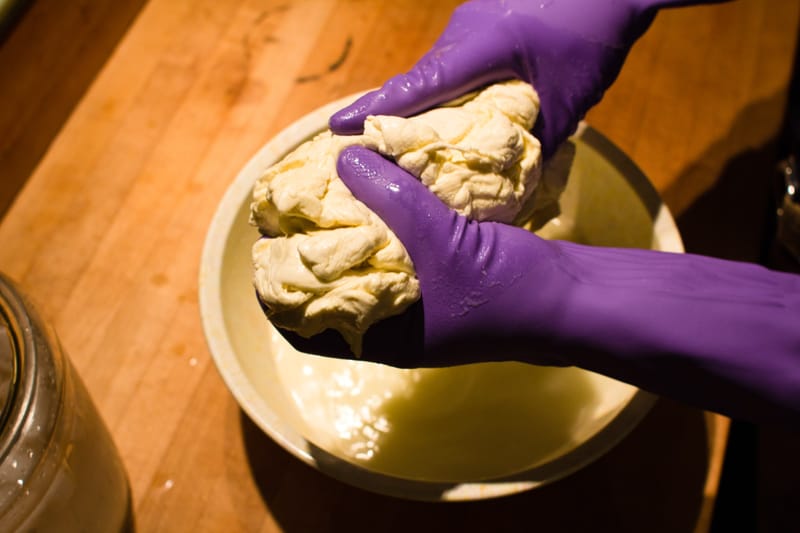
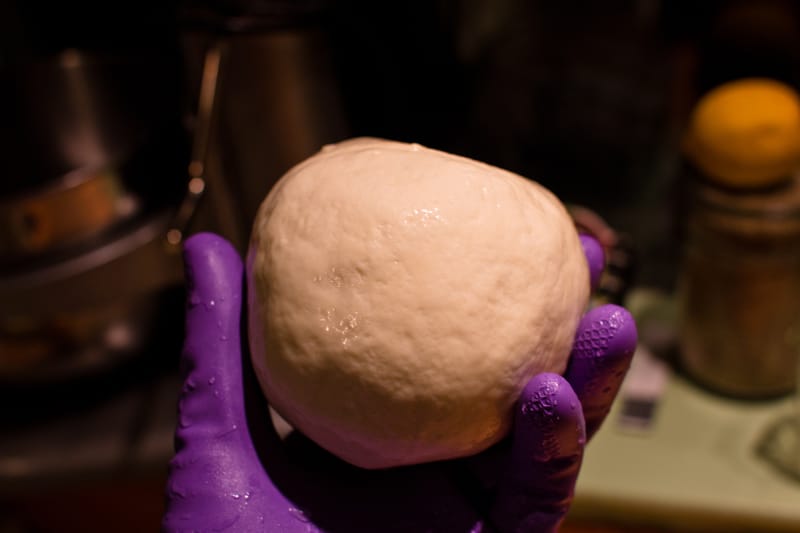
Oh well. I stretched as best I could. You’re supposed to pull it out two or three times like you’re making saltwater taffy (because, you know, everybody has done that, right?). Meanwhile, you’re wrist-deep in 180 degree whey, and your stupid Good Housekeeping approved neoprene gloves are not quite as insulative as you had hoped. And you didn’t take off your stupid thermal before starting, so you’re frustrated and hot and you spent nine hours making two pounds of this stupid fail cheese you’re such an idiot…
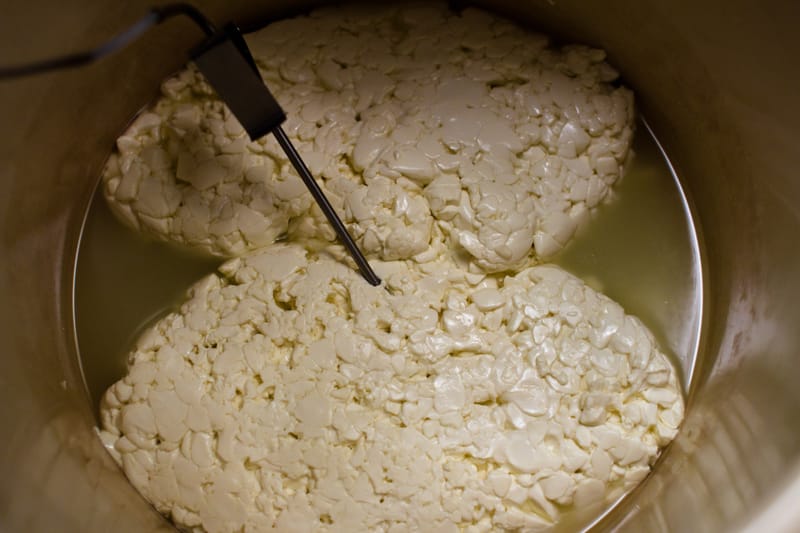
…aaaand deep breath. And relax. That doesn’t look so bad now. After streching a few times, you shape it into a ball or two, or a sausage shape, or a “jug” shape, or a gourd shape. Apparently provolone can be whatever the heck shape you want it to be, so that’s exciting. Next time I’ll be sure to make a mobius strip or a klein bottle. This time around I made a ball, and a “jug”.
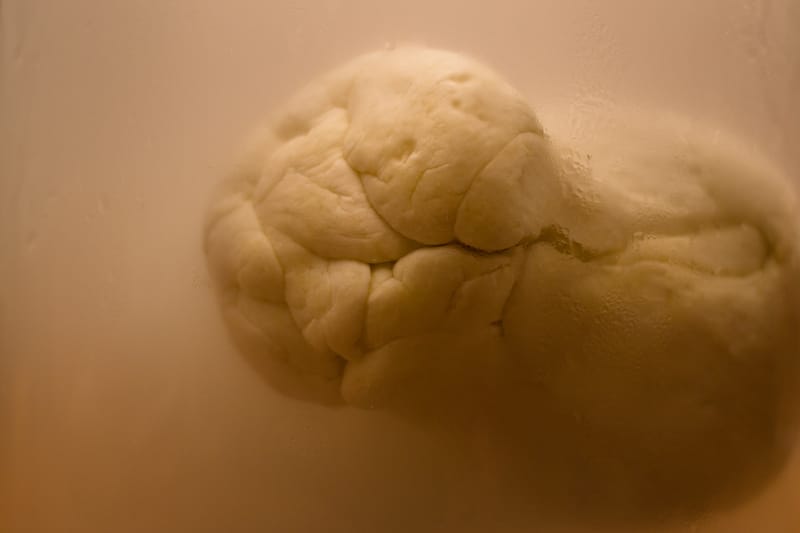
Because of my aformentioned problems, not only didn’t the curd stretch well, but it also didn’t knit back together so hot. You can see on one side it seems like a smooth and shiny ball, but on the other side—let’s call it “the butt”—it simply wouldn’t gather back up into a smooth surface. I’ve got tons of cracks and crevices in both cheeses because of this. Surely these will cause me mold and cracking issues during aging. I think we’ll eat these as fresh as possible in about three weeks.
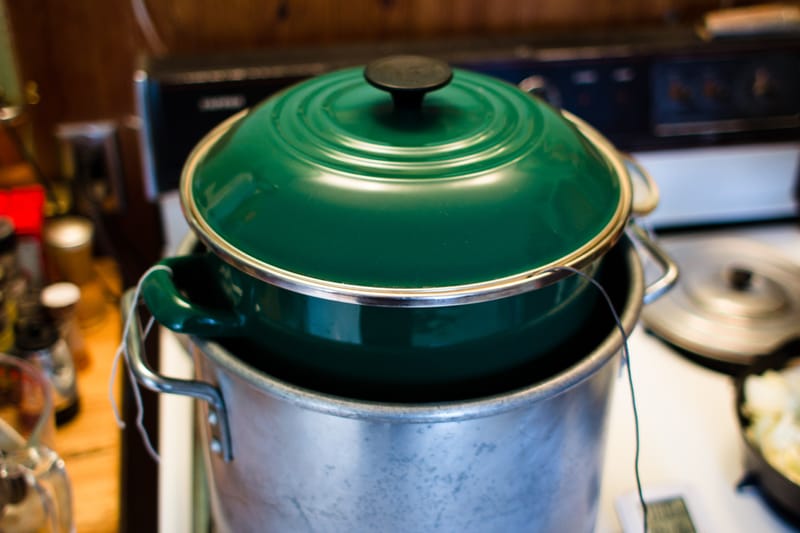
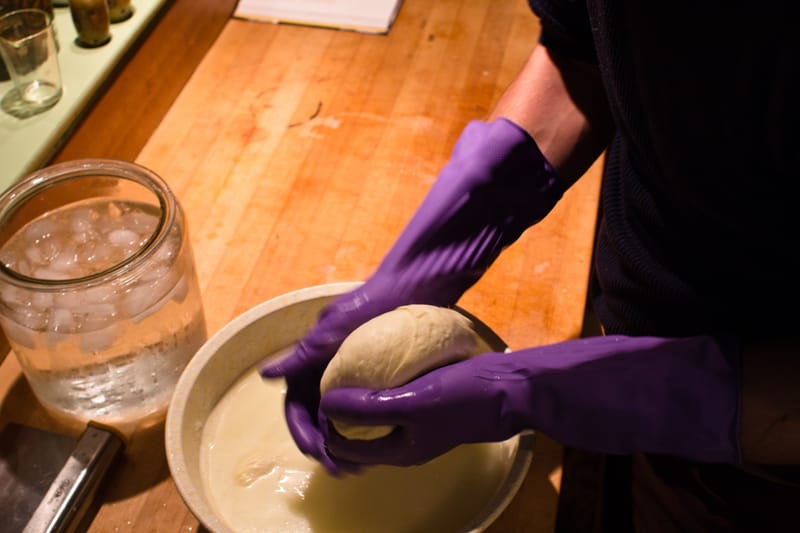
The cheese above that looks like a lab specimen is actually floating in an icewater bath. You need to cool down your hot cheese in order to firm it up in whatever dysfunctional shape you’ve massaged it into. After doing so, we make a brine out of the reserved whey and some kosher salt, cool it to cheese cave temperatures (fifty-five degrees), and let the cheeses sit in it for a day.

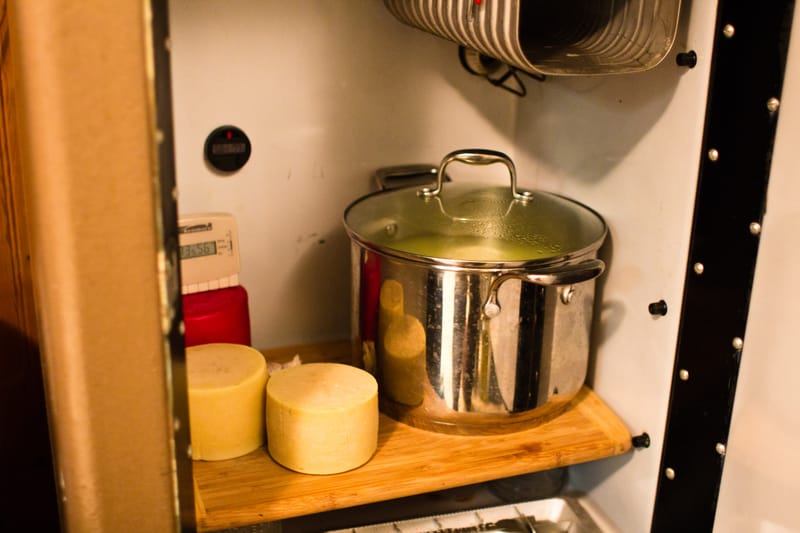
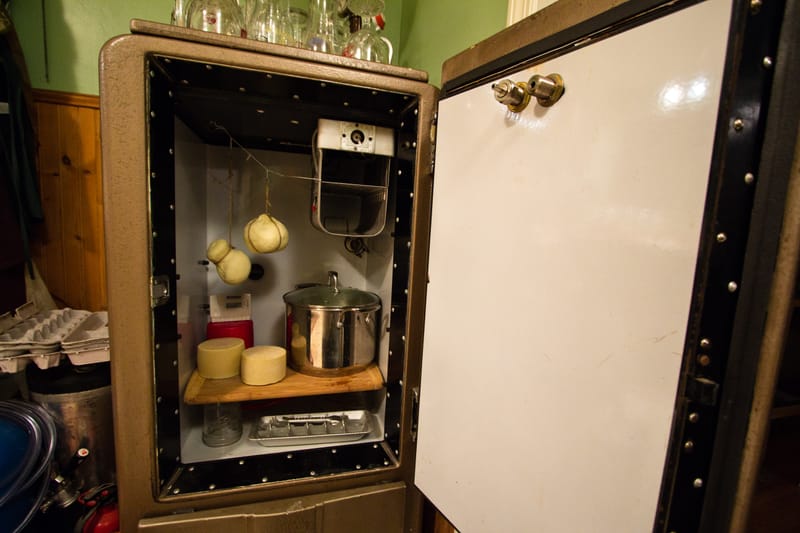
And finally, twine it somehow, and hang it in a fifty to fifty-five degree fridgecave for three weeks. After that, you can eat it right away or age it for up to a year under more typical fridge temperatures. You can also smoke provolone pretty successfully, but I’ve decided to cut my losses and put no further effort into these particular cheeses. Maybe next time. Just remember you’ll need to cold smoke them, otherwise you’d end up with a delicious provolone puddle.
So that’s that. Believe it or not, there are more pictures in my cheesemaking set on Flickr, if you’ve not had enough already. And stay tuned for more cheesemaking adventures, because nothing says “summer” like spending the weekend inside, standing over a hot stove. Yay!